![]()
![]()
![]()
![]()
![]()
![]()
![]()
![]()
![]()
![]()
![]()
![]()

Yes, you have to start somewhere. As mentioned elsewhere, a permanent layout, however modest, is a far better thing than having to constantly unpack, set up, operate, disassemble and pack up all the time. It also lets you start to get creative.
These pages (3) will give some ideas on constructing a basic layout. Most of the pictures show HO / OO scale, but the methods work for other scales too.
First of all, let me say that there is no one particular "right" or "correct" way to build a model railway. There are too many methods for me to even try to mention them all, and certainly not do justice in trying to describe them all (even if I knew what they all were). Suffice to say that what follows here is just the basics. If you want more detailed information or ideas on more complex layouts, then I strongly suggest picking up one or more of the many books on the subject. You'll find that one book will tell one or more ways to go about the task. And another book will tell you several completely different ways to go about it. Read up, gather ideas and then select the method or methods you like the sound of.
![]()
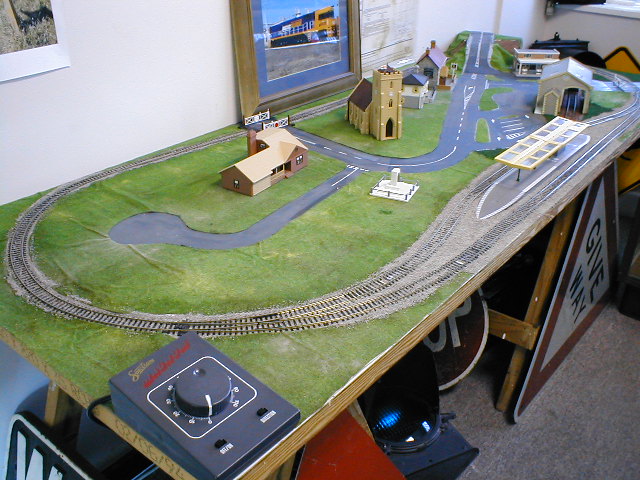
Above: The completed layout as described below. A model railway can be complete,
but never finished. There is always more to add or change.
This layout sold before I had a chance to finish it. More buildings, trees,
vehicles, people, animals and so on were still to be added. It is things like
this that add 'life' to the model.
If you are a complete novice at model railways,
and just want something quick, easy and minimum fuss, then here is just one
possible way to go
about it. The layout referred to is shown above.
The board. This is the obvious starting
point. If you're not into carpentry at all, you'll want something easy to make,
or perhaps even ready made. An old table, the large sheet of chipboard, even a
table tennis table are some of the things I've heard of people using. And it
really isn't all that difficult to build something yourself.
To date, I've built a couple of layouts on doors. Some people worry about doors
warping, but an O gauge layout I built over 20 years ago on 6 and 2/3rds of a
door has yet to exhibit any warps. And a more recent OO layout I also built on a
door. I've also seen others at model railway exhibitions.
A door is somewhat narrow for a HO layout, but 15" radius curves will fit on a
standard door. 15" is about the absolute minimum radius available in HO scale.
Of course you can also join 2 or more doors together. An easy way to do this is
to join them with hinges. By removing the hinge pin, you can pull the boards
apart should you need to do so later. Replace the hinge pin with a similar size
nail if you will be disassembling the boards frequently.
 Click on the thumbnail to see how to join baseboards with hinges as described
above.
Click on the thumbnail to see how to join baseboards with hinges as described
above.
![]()

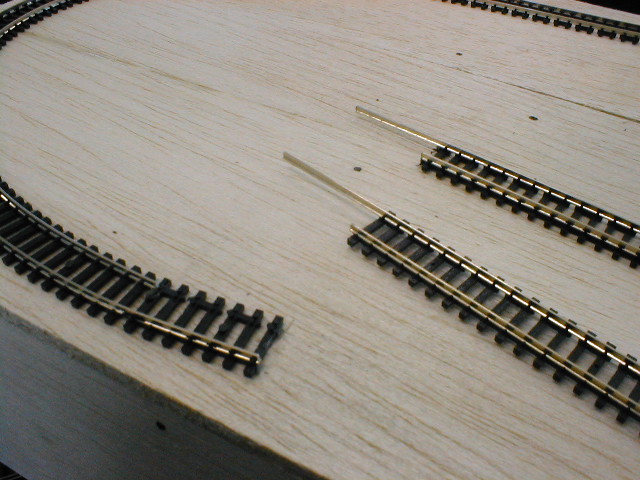
Laying the track.
Having selected or constructed your baseboard, the next task is to lay the
track. Set track is easiest to start with. The layout above was built with
flexible track however. Either way, the track can be nailed straight onto the
board.
There are also track underlays available. They are not absolutely necessary
if you're using a smooth surface (such as the door above), but
are worth considering now as it is somewhat impractical to add them later. Reasons for their use include sound deadening,
providing a good surface on which to lay the track and better appearance
due to raising the track above ground level. Roadbed style tracks already do the
latter.
If using set track, slide the sections together carefully. Ensure that the rail slides into the joiners, not on top of them. If using flexible track, you'll need to trim the rails to length on curves as you lay it.
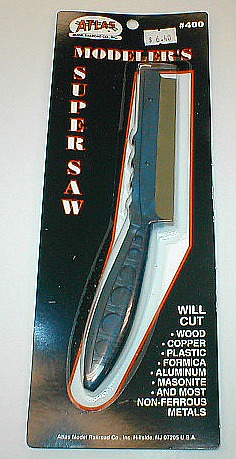
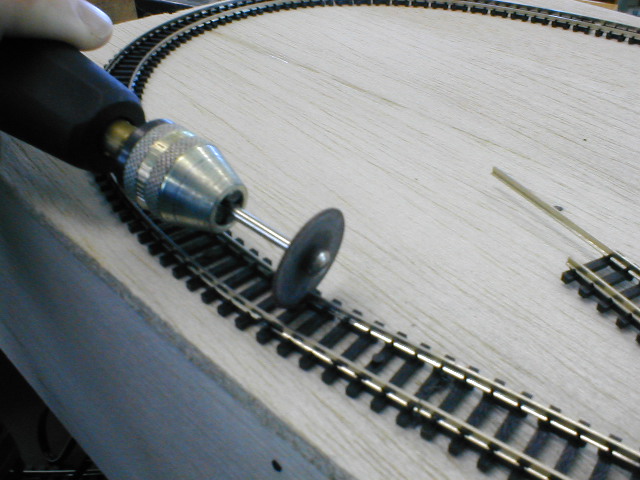
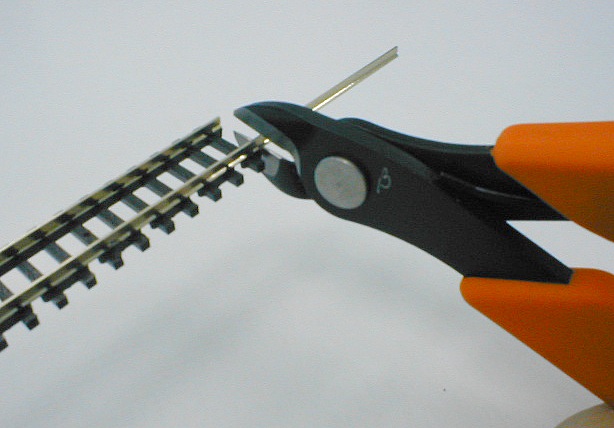
You can cut rail with a razor saw (Atlas snap saw pictured above left), a motor tool (Dremel being a popular brand) with a cutting disc (click on the centre photo above) or a specially made rail cutting tool (Xuron, on the right). A hacksaw is likely to snag and rip the rails out of the sleepers. Side cutters will work, but crush the rails, requiring extensive cleaning up with a file before you can slide a rail joiner on them. Unless you only need to cut a few lengths of track, any of the above are recommended. The Snap-Saw is the cheapest option. Xuron the quickest and easiest to use. If you already have a motor tool, then use that. These have many other uses besides cutting track and even outside hobby use. But probably not worth buying for rail cutting alone.
The Atlas Snap-Saw, Xuron Rail Cutters and motor tools are all available from Hobbies Plus.
When laying flexible track, especially on curves, you can easily cut both rails at the same place, but it is sometimes worth the little extra effort to stagger the joints as shown by clicking on the above photo. This keeps the rail from creating a kink at the joins.
Fasten the track to the board by nailing it down.
Small blackened nails or pins are sold for this purpose. You could use ordinary
nails, but they are usually larger diameter and tend to split the plastic
sleepers and cause other damage or poor running.
Trying to hold the tiny nails in place and hitting them with a hammer without
crushing your fingers can be quite a challenge. While a smaller hammer is one
solution, you can also try holding the nails in place with a pair of needle-nose
pliers and hit that instead. A much better way is using the specially made nail
drivers (Peter Post - available from us) which hold the nail magnetically. You
simply push the nail in place. Or you can tap the driver with a hammer if you
prefer. Try to avoid pushing the nails all the way in. This makes removal later
easier if you find you need to move the track.
Track can also be screwed in place if you prefer or even glued if you are really
confident of getting it right the first time. I've found Liquid Nails or similar
works well for this purpose. But I would not recommend this method to begin with.
![]()
![]()
Page updated 16/10/2012